Wednesday, March 21, 2012

Signs of Spring

Happy Spring!

I'm afraid I've been neglecting my blog for awhile.  I could say that I've been busy with school, which is somewhat true, but honestly, I just haven't felt very inspired to write posts lately.  I do have a bit of good news, though...I got in to nursing school!

It was a beautiful day today and I just couldn't help but take a few pictures.


I am taking a class on Saturday to learn how to use my camera, so hopefully my pictures will keep improving.

Cheers!
Jenn

Saturday, March 17, 2012

An Irish Blessing


May the road rise to meet you,
May the wind be always at your back.
May the sun shine warm upon your face,
The rains fall soft upon your fields.
And until we meet again,
May God hold you in the palm of his hand.

May God be with you and bless you:
May you see your children's children.
May you be poor in misfortune,
Rich in blessings.
May you know nothing but happiness
From this day forward.

May the road rise up to meet you
May the wind be always at your back
May the warm rays of sun fall upon your home
And may the hand of a friend always be near.

May green be the grass you walk on,
May blue be the skies above you,
May pure be the joys that surround you,
May true be the hearts that love you.

Happy St. Patrick's Day!

Friday, January 27, 2012

God Save the Queen

Question:  Where do you buy a Christmas present for a friend who has everything and wants to be British?
Answer:  Nowhere.  You make a Union Jack pillow for her!


I got to use my Mom's sewing area for this project.  It's a great place to spend an afternoon.  You can't see it in this picture, but the view is really of the hills behind my parents' house.


I started with a 16-inch pillow form and red, white and blue fabrics.  For a little added fun, I purchased a red on red patterned fabric.


I didn't free-hand this project, but I didn't have a pattern, either.  I based it on an image that I found on Google.  Here it is on my new iPhone!!


And then I measured.  A lot.

These are the approximate measurements I used:
  • blue fabric
    • 18 x 18 inch square for the front
    • 2 - 18 x 12 inch rectangles to create an envelope opening on the back
    • 144 x 6 inch piece for the ruffle.  I sewed together three 48 x 6 pieces.
  • white fabric
    • 2 - 18 x 5 inch strips for the horizontal and vertical strips
    • 2 - 25 x 3 inch strips for the diagonal strips
  • red fabric
    • 2 - 18 x 3 inch strips for the horizontal and vertical strips
    • 2 - 25 x 2 inch strips for the vertical strips

After all of the measuring, I cut everything.  And then I ironed.  A lot.  I ironed each strip with a half an inch on each side, so the finished pieces measured 18 x 4 and 25 x 2 inches for the white strips and 18 x 2 and 25 x 1 inches for the red strips.  

For the diagonal strips, I sewed the red on top of the white off-centered.  If you look at the flag image, you can see that the strip from the upper left to lower right corner is the same all the way across. However, the strip from the upper right to lower left corner is different on the top half than it is on the bottom.  To achieve this, I cut the strip in half so I could invert it before I sewed it to the blue fabric. 


I stitched both pieces to the blue fabric, and then I pinned and stitched the other diagonal piece to the blue fabric.

Next, I pinned the horizontal white strip over the diagonal strips and sewed it to the blue fabric.


The next step was to stitch the vertical white strip perpendicular to the horizontal strip.  Once this was done, I pinned and stitched the horizontal red strip.  I measured carefully to ensure that it was centered on the white one.


Finally, it was time to affix the vertical red strip.  Again, I measured carefully to make sure that it was centered.


I love how the pattern turned out!

Next, it was time for the ruffle.  I folded the ruffle piece in half so it was 144 x 3 inches.  Then I ironed it to keep the fold nice and crisp.  My Mom's sewing machine has a really cool gathering foot, so I used that to help gather the ruffle together.


I pinned the ruffle around the edges of the front piece and sewed with a 1-inch seam allowance around the edges.


This is what the pillow front looked like with the ruffle attached:


For the back, I folded, ironed and stitched each piece on one side, to ensure a finished look.  I pinned each piece over the ruffles to create the envelope back.  Make sure that the back pieces overlap each other by a couple of inches.  When I sewed the back on, I used the seam from the ruffle as a guide of where to sew the pieces together.  I'm not going to lie - the corners were a bit difficult to sew through, because the fabrics were so thick.  I love how the back of the pillow front looks with the different colored threads!


Before I turned the pillow right-side out, I trimmed all of the edges so they weren't so bulky.


And...voila!


This pillow turned out to be so beautifully.  I am a little sorry that I didn't make one for myself!  

And my friend, well, she loves it, too!  Here is a picture of the pillow on her couch.  You can see it is in good company.


And a picture of my friend, Heather, posing with her Christmas gift.


Cheers!
Jenn


Friday, January 13, 2012

Welcome 2012

Greetings Blog Friends!


With three weeks off from school, I had every intention of catching up on blog reading and writing a few posts of my own.  But I didn't factor how busy I would be with all of the fun things that I would be doing while visiting family and friends in California.  Some of the highlights included:
  • My birthday dinner with friends and family.  My Mom made a delicious dinner, and I made peppermint cupcakes and set up a hot chocolate bar.
  • Learning to use (& play) with my new iPhone!
  • Starting and finishing my Christmas shopping and wrapping gifts.
  • Baking M&M cookies and making Salted Chocolate Caramel Pretzel Bark.
  • A Christmas concert at my church.
  • Fun & Festive Christmas parties.
  • Christmas Eve at my brother's house.
  • Helping my Mom in the kitchen with Christmas dinner.
  • Figuring out the basics of my new camera!
  • Going on a TMZ Tour with friends in Hollywood.
  • Attending the Holiday Bowl in San Diego and a Ducks game from the 3rd row - thanks, Heather!
  • Enjoying the performance my talented friend in a holiday dinner theatre show. 
  • A delicious dinner at Mastro's for my brother's birthday.
  • A special New Year's Eve dinner at 370 Common in Laguna Beach.  The Sous Chef is my friend's brother!
  • Karaoke with friends.
  • Read The Girl with the Dragon Tattoo.
  • And, of course, plenty of quality Auntie time with my 9-month-old nephew, including a couple of days of babysitting!
Now that I am home, and school has started, I have a bit more time to get caught up!  I'm sure that won't last long, so I am going to enjoy it while I can.  I thought I would also share a few of my goals for this year.
  • Learn how to use my new camera and improve my photography skills.
  • Eat more vegetables and fruits.
  • Finish some of the projects around my house that I had planned for last year (like paint my bathroom)!
  • Organize my pantry.
  • Be more consistent with writing blog posts.
  • Exercise regularly (at least 3 times/week).
  • Start a vegetable garden.
  • Read more books for fun, but not at the expense of the massive amounts of reading for school!
I'm sure I could add a lot more to this list, but I think this is a pretty good start for now.  

I have a project to share with you, but I'm having trouble getting a couple of the pictures off of my phone, so hopefully I'll get that resolved and posted in a few days.  It was a Christmas present, so I used my point & shoot Canon for most of the pics, because I didn't have the new one yet.

I hope that your new year is off to a great start!

Cheers!
Jenn  


Saturday, December 31, 2011

Happy New Year


Wishing you and your family blessings and joy in 2012.

Cheers!
Jenn

Friday, December 23, 2011

mmm...mmm...Cookies!


Holiday Greetings!

I've been enjoying time in California with my family and friends.  I've been quite busy this week finishing my shopping and a last minute craft, wrapping presents and holiday baking.  Today I baked some of my favorites, M&M Cookies.  I've loved these cookies since I was a child, and I make them every year during the holidays because they are so easy, but very festive.  They are basically glorified chocolate chip cookies.  The real treat for me was being able to bake them in my Mom's beautiful new kitchen!


M&M Party Cookies
1 cup shortening
1 cup firmly packed brown sugar
1/2 cup sugar
2 tsp vanilla
2 eggs
2 1/4 cup flour
1 tsp baking soda
1 tsp salt
1 1/2 cup plain M&M's (3/4 lb)

Preheat oven to 375 degrees.
Blend shortening, brown, and granulated sugars in a large bowl.
Beat in vanilla and eggs.
Sift remaining dry ingredients together and add to the sugar mixture, blending well.
Stir in M&M candies.
Drop from teaspoon on an ungreased cookie sheet.
Bake 10 minutes or until golden brown.

I never measure the M&M's.  I just buy a regular sized bag and pour them all in.


I also use parchment paper on the cookie sheets which helps to make clean up so easy!


The shortening makes these cookies both crisp and chewy at the same time.  Yum!


Be sure to share your cookies with family and friends, as they are very addictive!  Santa might appreciate a cookie or two as well.


Hm...would one of these before bed inspire visions of M&M Cookies dancing in my head?

Cheers!
Jenn


Wednesday, December 14, 2011

O Tannenbaum...

Holiday Greetings!


Today is a wonderful day.  There are just eleven days until Christmas; we are expecting highs in the low 40s; and at 3:00 I will be done with finals!
*Shameless update - I got an A in anatomy - Merry Christmas to me!*

I am so excited to showcase my Christmas tree for you.  I have had my tree up since the Sunday after Thanksgiving and have been enjoying the glow of the lights and Christmas memories all month long.

The best part of decorating my tree is that it is like looking through a scrapbook.  I have amassed quite a collection of ornaments through the years.

Many are from my childhood.


Many are from my travels.


And of course, there is my collection of Wallace Candy Canes (thanks Mom!).


I decided to highlight some of my favorites, new and old.  

I love this dollhouse.
I don't even remember how long I've had it, but it always gets a prime location.
The best part is that it reminds me of the pink dollhouse that my Dad made for me.


My brother gave me the RV from National Lampoon's Christmas Vacation.
(He knows it's my favorite Christmas movie!)


My friend brought me this ornament of George Frederick Handel, from London.
(She knows he's my favorite composer!)


Such a cute little ballerina.


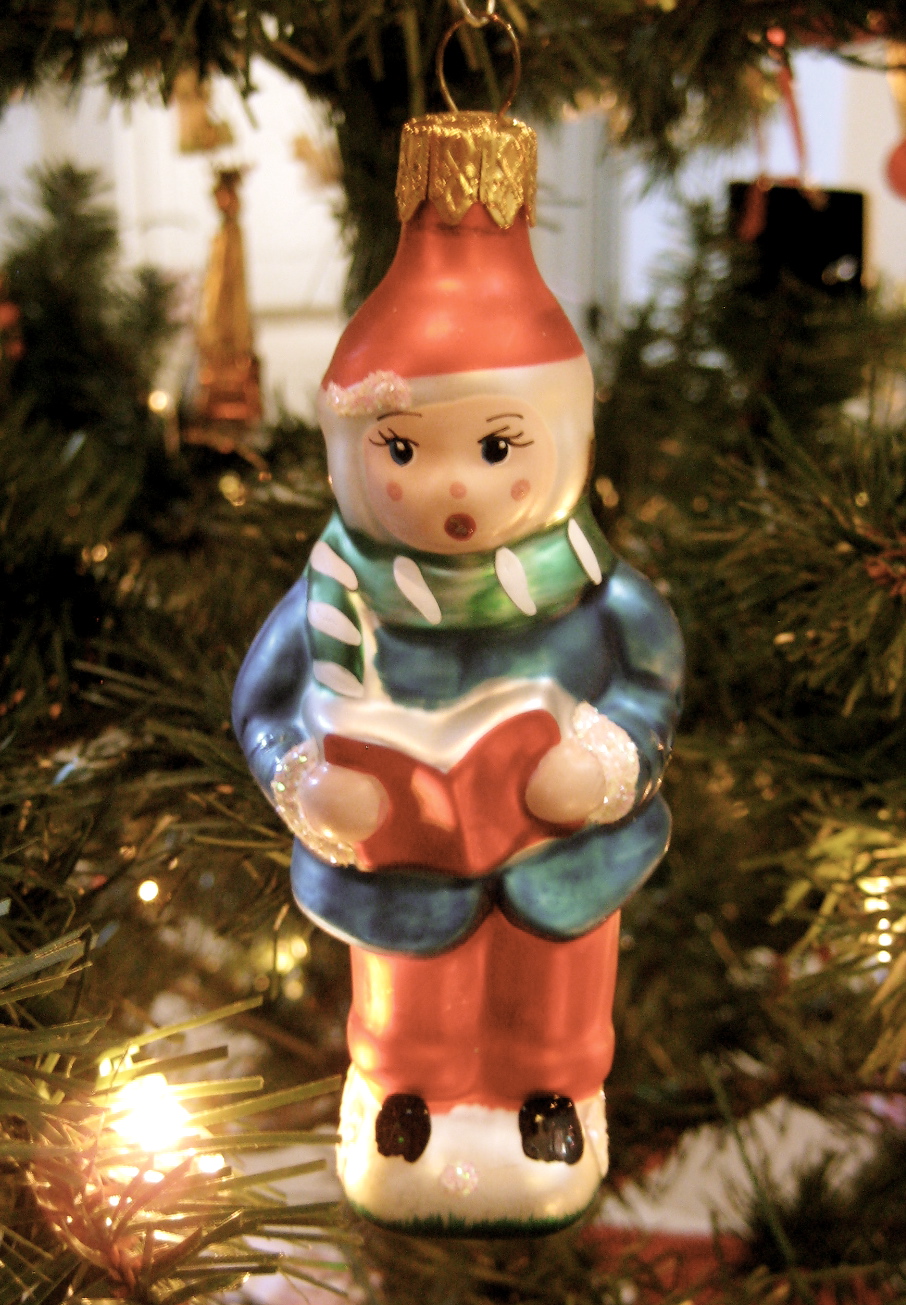
A handblown glass choral singer!


I can't put up my tree without hanging a picture of my sweet Harley.
I miss him a lot.


Le Tour Eiffel, mais oui!


Sleeping Beauty's Castle at Disneyland, all decked out for the holidays!
This one harkens back to my days as a Disneyland Cast Member.


A Venetian glass Santa, imported from Venice, by me!


My friend's Mom made me this cute mouse in a mitten.


I had a friend bring back this ornament from London,
commemorating the marriage of William & Kate.


I bought this wooden carving of the Globe Theatre when I was in London with my Mom.


I love to fill in small spaces with these sparkly snowflake ornaments.
I bought them at the cutest shop in Chesterfield, MO, with my Mom.


Glittery words, like peace, joy, noel, ho ho ho and merry & bright also adorn my tree.


And don't forget the hidden pickle!
There is a German legend of hanging a pickle ornament on the tree.
I'd like to say that I hang a pickle in homage to the part of my heritage that is German.
But I just bought it this year at Crate & Barrel!


It was difficult to choose just a few ornaments to share.  And as you can see, even with a narrowed down list, it's still pretty long!

I don't have any presents under the tree, yet.  Just a couple of pretty boxes.


O Tannenbaum, O Tannenbaum, wie treu sint deine Blätter.


O Christmas Tree, O Christmas Tree, how lovely are thy branches.


Cheers!
Jenn